|
CST8207: GNU/Linux Operating Systems I |
Lab Worksheet Seven – Fedora 12 Install |
VMware and O/S Installation |
This Lab Worksheet/Installation contains essential installation work needed for your upcoming Assignments. You do not have to hand in this Lab Worksheet, but there is a mandatory checklist at the end. You must do this installation work before you can do future assignments in this course. See your instructor for assistance.
You need a working virtual machine manager installation such as VMware or VirtualBox.
10-50 GB of disk space to hold Linux Virtual Machines and Snapshots (backups).
A College Internet connection or a copy of the Fedora 12 32-bit DVD disk or the downloaded 3GB Fedora 12 32-bit ISO file. You will download this disk in Step Two below if you have an Algonquin College Internet connection. If you are at home, you may have to search the Internet for a copy of this Fedora 12 32-bit DVD. The ISO file is about 3GB in size. You can skip forward to Step Two on Page 6 to start downloading the ISO file now, while you work on Step One of the install process below.
A
separate hard disk for backups
of your course work and virtual machines. Back
up your hard disks!
(Space
for backups is
optional but highly recommended!)
Follow these procedures carefully. Read all the lab instructions (all the words) before starting. Not everything in this lab is presented in strict chronological order. Read it all, then proceed in a logical order. Don't forget to have your instructor mark your checklist on the last page of this Worksheet.
The two steps are to first create an empty Linux style virtual machine, then install Fedora 12 Linux in it using the Fedora 12 installation DVD. The virtual machine creation instructions below are for VMware Workstation; you may also install Fedora 12 Linux into any other Virtual Machine manager (such as VirtualBox or Fusion) though faculty are only prepared to offer full assistance with VMware Workstation.
The steps to create a Linux style virtual machine are similar for VMware versions 7, 8, and 9. The exact dialog boxes and options may vary slightly. (Mac VMware Fusion users should also see similar option choices.)
In your Windows host O/S, locate and start VMware Workstation.
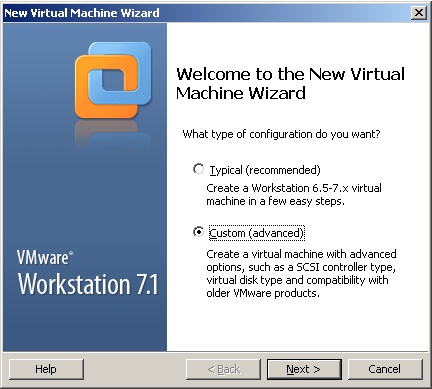
Go to the VMware File menu and click New Virtual Machine or select: New Virtual Machine from the Home panel.
Select Next Custom installation in the New Virtual Machine Wizard dialog window that appears, then click Next.
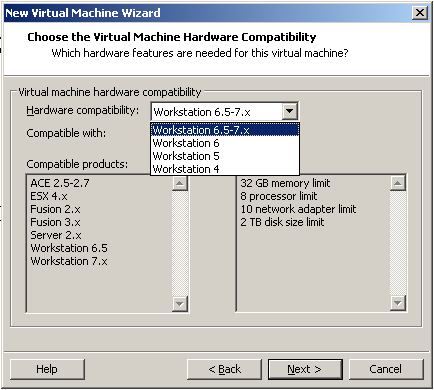
In the
Virtual
Machine Hardware Compatibility
dialog box, you have several choices. The Algonquin T126 machines
have a given version of VMware installed on them, so if you want the
most flexibility to run your virtual machines off your external disk
caddy using T126 hardware (e.g. in case you forget your laptop or
your laptop is dead), you must choose the same VMware version for
your laptop as is installed on the T126 lab machines. (Go check
what version that currently is!) If you will never
use the T126 machines, so you don't care what version of VMware is
running in the lab, you can leave the VMware compatibility setting
on your laptop at the highest version offered (e.g. Workstation 9,
if you have it).
Choose
the VMware compatibility version wisely, then
click Next.
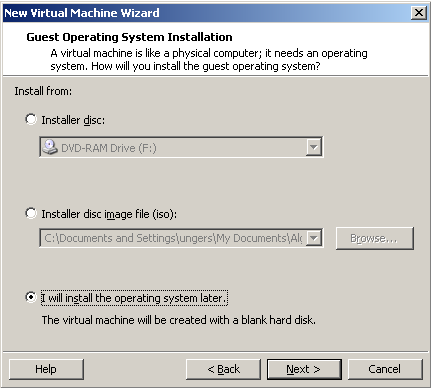
Select I will install the operating system later, then click Next.
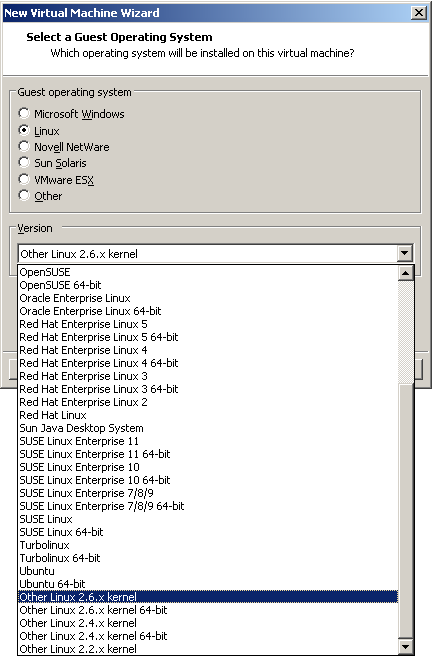
Select Linux as the Guest operating system and chose Other Linux 2.6.x kernel, then click Next.
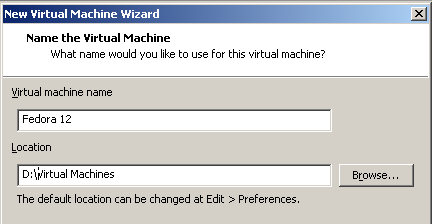
Change the
Virtual
machine Name
(Other
Linux 2.6.X kernel)
to Fedora
12.
Set
the Location
to the Windows folder containing all of your Virtual Machines.
(Create a new folder if needed.) Make a note of this Location
folder name and use the same
folder name for your .vmdk
disk down in Step
17,
below. When you have written down the Location
folder name, then click Next.
The
location is:
____________________________________________________________________
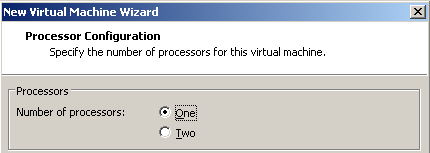
The number of processors (and cores, if needed) should be set to One, then click Next
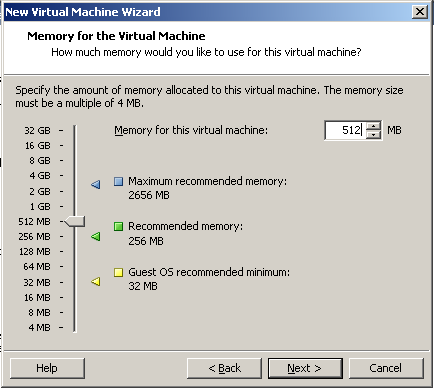
In the Memory dialog box, set the Memory for this virtual machine to 512MB, then click Next.
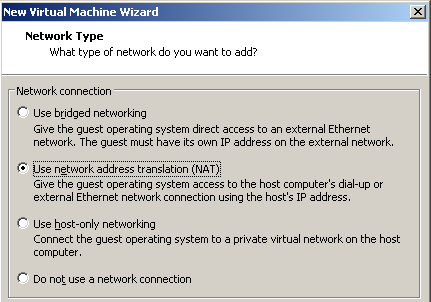
Set the Network connection to Use network address translation (NAT), then click Next
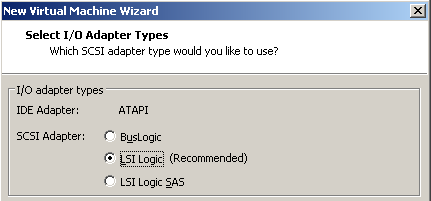
Set (if necessary) the I/O Adapter Types dialog SCSI Adapter to LSI Logic (Recommended). Click Next
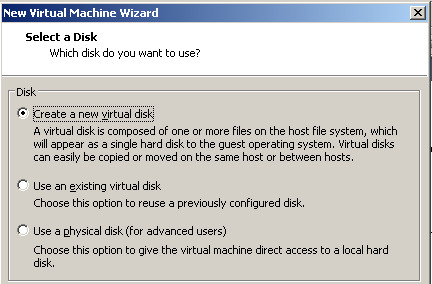
Choose Create a new virtual disk in the Select a Disk dialog, then click Next.

The Disk type should remain SCSI (Recommended). Click Next.
If you are asked, the Mode “Independent” should remain un-checked. Do not check Mode “Independent”.
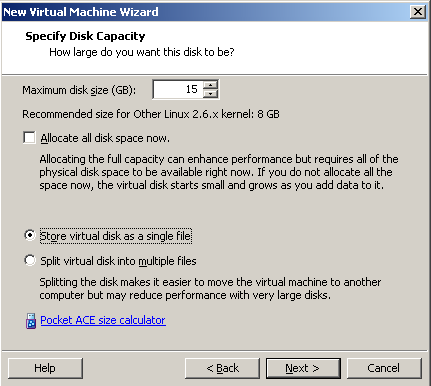
In the Specify Disk Capacity dialog box: Set the Maximum disk size to 8 GB. (The image says 15 - use 8 not 15.) Select Store virtual disk as a single file. Do not select Allocate all disk space now. (If you allocate all disk space now, then when you copy the Virtual machine to another location or clone it, it will take a VERY long time.) Click Next.
In
Specify
Disk File
leave the Disk
File
name as Fedora
12.vmdk,
but make sure this disk file is stored in the same
folder as the rest of your Fedora
12
virtual machine files! Some versions of VMware do not correctly use
the same Location
parent folder as you set back in Step
8,
above.
When you have verified that the .vmdk
file location folder is in the same Fedora
12
folder and Location
as Step
8,
then click Next.
Review the Ready to Create Virtual Machine information and make sure it matches this list exactly:
Name: Fedora 12
Location: where you store all your virtual machines for this course
Version: Workstation 8 (or 9, or whatever version you have)
Operating System: Other Linux 2.6.x kernel
Hard Disk: 8 GB, Monolithic (make sure this is only 8 GB)
Memory: 512 MB
Network
Adapter: NAT
Make sure
your Virtual Machine has the above settings, then click Finish.
Read
carefully the Virtual
Machine Created
screen. It tells you what we will be doing next. The next section
will install the Guest
Operating System
and the VMware
Tools.
Close
the Virtual
Machine Created
dialog box.
In
your Windows file explorer, go to the Location
folder from Steps 8 and 17 and make sure
that the Fedora
12
folder contains both the VMware .vmx
file
and
the VMware disk .vmdk
file! If this is not
true, delete this virtual machine and recreate it with both the .vmx
and .vmdk
files in the same
folder!
Did I mention that your .vmx and .vmdk files must be in the same Fedora 12 folder? If not: Start Again!
Choose either the A: ISO Method or the B: Physical DVD Method below. The ISO Method is likely faster and less prone to errors than trying to use a scratched physical DVD. It also lets you re-install Fedora 12 anytime without needing a physical CD. Use the ISO Method when possible. You must use Fedora 12 for this course. Other versions of Fedora have new bugs that cause problems. Use only Fedora 12 32-bit.
This is the fastest and most reliable way to get your own copy of the Fedora 12 32-bit DVD ISO image Fedora-12-i386-DVD.iso and connect it to your Virtual Machine.
First, follow these instructions to get your copy of the Fedora 12 32-bit DVD ISO image: http://teaching.idallen.com/cst8207/13w/notes/570_fedora12.html Remember where on your local machine you downloaded the DVD! Fedora-12-i386-DVD.iso
After verifying the download, select the Fedora 12 virtual machine in the VMware Tabs menu or left Sidebar. Go to the Virtual Machine Settings by selecting Edit virtual machine settings or using the Settings entry under the VM menu (or use keyboard hotkey CTRL-D).
In the Virtual Machine Settings dialog box, in the left area showing all the virtual devices, click to open the virtual CD/DVD device, which will display the Device Status and Connection information for this CD/DVD device on the left.
Select Use ISO image file and Browse to locate and connect the virtual CD/DVD device to the Fedora DVD .ISO image file you just downloaded. The path to the .ISO image will appear in the box underneath the selected Use ISO image file. It should contain Fedora-12-i386-DVD.iso
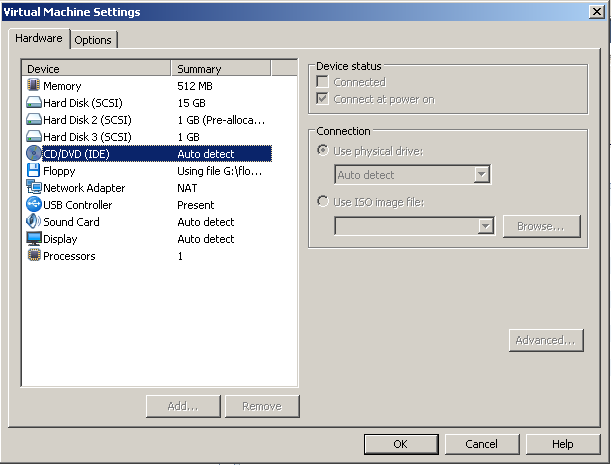
Make sure the CD/DVD Device status at the top right is set to “Connect at power on”.
Save the settings.
in VMware, select Power On This Virtual Machine to start (boot) the virtual machine.
Skip over part B (Physical DVD Method) below and proceed to Step 2 below.
Use this physical DVD method only if the ISO Method (above) is not available. We don't recommend it.
Insert the physical Fedora 12 DVD in the physical CD/DVD drive. (Must be Fedora 12!)
Select “Use physical drive” in the VMware Settings for your virtual CDROM.
Make sure the Device status is set to “Connect at power on”.
Save the settings.
Select Power On This Virtual Machine to start (boot) the virtual machine.
Watch out for I/O errors from a damaged DVD! If the DVD shows any errors at all during the installation, start over with a different DVD or use the ISO Method. Do not proceed with a damaged DVD installation, even if it appears to finish correctly!
Continue to Step 2 below.
Continue here at Step 2 after you have connected your virtual CD/DVD drive to a Fedora 12 installation CDROM or ISO file:
First
time boot from the Fedora 12 DVD or ISO file:
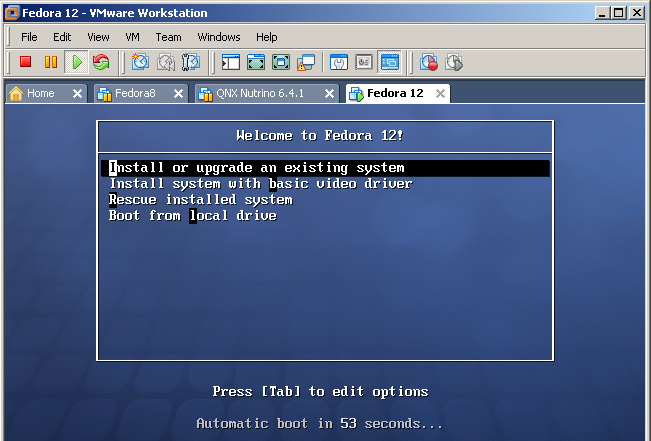
When you have booted (powered on) the new virtual machine from the
Fedora 12 ISO or the DVD, click the mouse in the Welcome
to Fedora 12!
window and then use the keyboard arrow keys (the mouse does not work
on this initial screen) to select Install
or upgrade an existing system
and press ENTER. (This is the default entry and it will auto-select
itself anyway after a 60-second time-out. Using the arrow keys will
cancel the time-out and let you wait as long as you want.)
Skip Testing the media, unless you are concerned that your DVD or ISO may be damaged. (If you verified the checksum of the downloaded .ISO file, you can safely skip this step. If you did not verify the .ISO file, or if you are using a physical DVD, you must do a verify now, at least once, to make sure the .ISO file is good and not corrupted. Delete or discard any corrupted DVD image and get a new one.)
When the Fedora title screen appears, select Next. (There are no other options available.)
Select the language and keyboard system: use the default English and USA settings. Click Next.
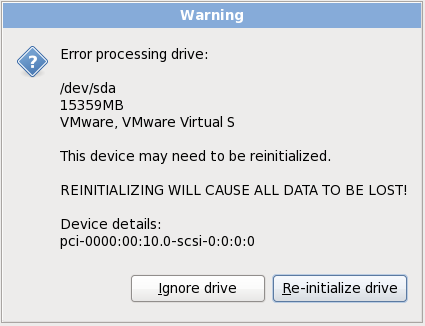
R e-initialize
the drive by selecting Re-initialize
drive.
(There is nothing on the new virtual disk drive yet.) This prepares
the Virtual Hard Disk (which is really a virtual machine disk
represented by a file) for Fedora.
e-initialize
the drive by selecting Re-initialize
drive.
(There is nothing on the new virtual disk drive yet.) This prepares
the Virtual Hard Disk (which is really a virtual machine disk
represented by a file) for Fedora.
Set
the Linux Hostname
to be your Algonquin
College
eight-character userid
(your Blackboard userid), made up of part of your last name followed
by some digits. Use your Blackboard
userid
for the name.
Select
Montreal
as the closest city to our time zone, and adjust the time
accordingly.
In some boot sequences, you can select a Time/Date option to have your system time synchronized automatically from Internet time servers. Be careful about setting your machine to do this; Algonquin ITS sometimes blocks access to external network time servers. Internet time synchronization appears to work in early January 2013 when this lab was updated. Algonquin has a network time server here for cases where using Internet servers are blocked: time.algonquincollege.com
Create a Linux Fedora root password. Do not forget this root password! This root account serves the same purpose under Linux as your Windows Administrator account serves under Windows.
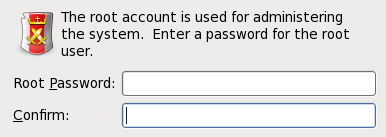
If
you forget your Linux Fedora root
password, you will need to restart your Linux machine in single-user
or Recovery
mode and create a new root password. Details for doing this are in
the Class Notes on the course web site. (Look in the Frequently
Asked Questions page.) Click Next when you have chosen your
password. Write your Linux root
password here: __________________________________
Did I mention that you shouldn't forget your root password? Write it down!
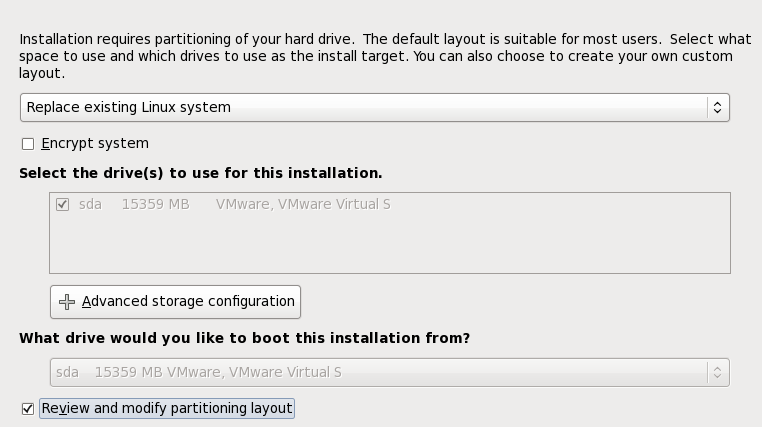
Leave the default Replace existing Linux system (even though there isn’t one) and check the Review and modify partitioning layout checkbox.

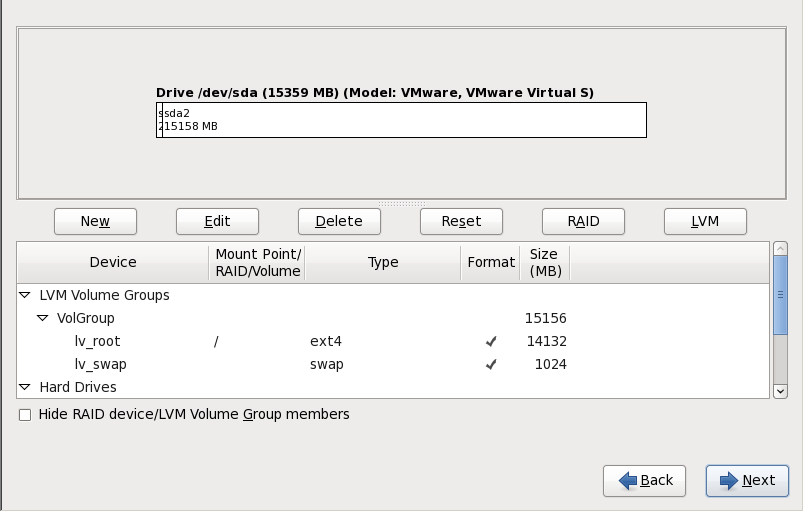
Leave the defaults as LVM Volume Groups. (More on this in the lecture.) Click Next.
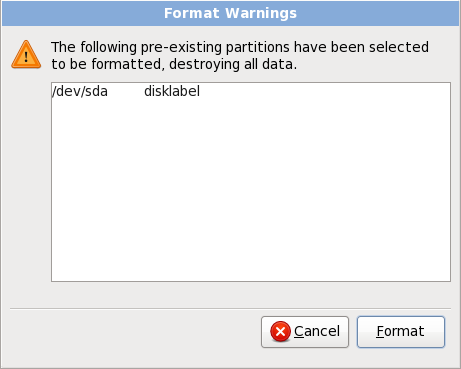
A
 Format Warnings
dialog will appear for the sda
(first) disk. (You should only see one
disk. Contact your instructor if you see more than one disk here.)
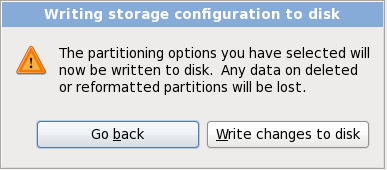
Click Format and
then Write changes to disk. The
formatting may take a minute or two to finish.
Format Warnings
dialog will appear for the sda
(first) disk. (You should only see one
disk. Contact your instructor if you see more than one disk here.)
Click Format and
then Write changes to disk. The
formatting may take a minute or two to finish.
Once the file systems have been created, you will see a Boot Loader Selection screen. Leave the “install boot loader on /dev/sda” checkbox as is selected by default and select Next.
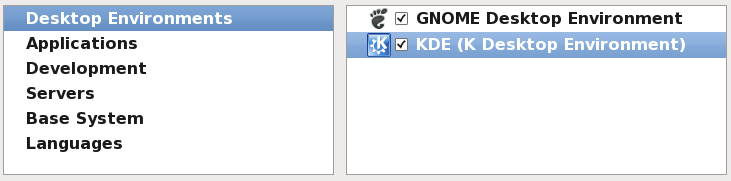
Select Customize Now, and click Next

M ake
sure both
GNOME and
KDE are
selected in the group of Desktop
Environments. Do not
select any other software packages at this time. (You could always
add more software later, but don't
do it with this older Fedora release; install something more recent.
You only have 8 GB of space available.) Click Next.
ake
sure both
GNOME and
KDE are
selected in the group of Desktop
Environments. Do not
select any other software packages at this time. (You could always
add more software later, but don't
do it with this older Fedora release; install something more recent.
You only have 8 GB of space available.) Click Next.
Click Next to start the software installation, which may take 30 to 60 minutes. You will be installing about 1,200 packages. (If you see a smaller number, you've missed something and should Reset your virtual machine, reboot, start over and select the correct options.) Wait until the install finishes. (If you are using an .ISO install, you can safely "Suspend" your virtual machine and resume the machine and installation later, if you run out of time today. If you are using a physical CD, this may not be true.)
When
installation is done
and you are prompted to reboot, do the
following before your reboot: If you
used the ISO Method,
above, go to VM Settings,
open again the virtual CD/DVD device, and un-check
“Connect at power on”.
If you used the DVD Method,
remove the DVD from DVD drive.
You may have to "force"
the unmounting of the CD/DVD device. Do so.
Windows VMware may
go unresponsive after forcing the unmounting. In that case, use the
VMware Power
menu to "Reset"
your virtual machine to hard reboot it. Fedora should reboot
successfully. If so, skip the reboot in the next step.
In VMware, select to Reboot the Fedora Linux virtual machine. (Do not reboot your Windows host system!) See the previous step to Reset your virtual machine if the Reboot hangs.
If you have successfully disconnected your CD/DVD, the Linux virtual machine will reboot Fedora 12 from the virtual hard drive. (If you see the Fedora Installation screen again, you have not successfully disconnected the CD/DVD at power on. Disconnect the CD/DVD, reboot, and try again.) The first time Fedora 12 boots, you will be asked a few questions before you can log in. Here are the answers:
You must create a non-administrative (regular) user account. Use your real name for the name and your eight-character Algonquin College userid for the userid, the same userid you used for the Host name earlier. The userid and host name will be the same eight characters. Set a password you can remember!
Now log in to Linux Fedora using your eight-character Algonquin College (Blackboard) userid.
If you used the ISO Method, above, go to VM Settings, open again the virtual CD/DVD device, and set the device to “Use physical drive”, then re-check “Connect at power on”. (If you used the physical DVD Method, your virtual CD/DVD is already connected to the physical drive.) Remove any CDROM.
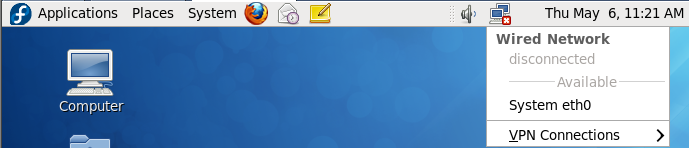
O
 nce
you have logged in
using your Algonquin userid, ensure that you are connected to the
network by selecting System
eth0
or System
eth1
from the network menu (dual terminal screens) in the top menu bar:
nce
you have logged in
using your Algonquin userid, ensure that you are connected to the
network by selecting System
eth0
or System
eth1
from the network menu (dual terminal screens) in the top menu bar:
You
may need to select this networking entry any time you resume
or reboot your virtual machine.
Use the instructions at the end of this lab to configure Linux access to the printer in this room (T126). Showing the Linux configured printer at the end of the lab is worth one of your lab marks.
Find the Terminal application in the Applications menus and drag its icon from its menu location up onto the bar at the top of your Fedora Linux window. This makes terminals easier to start.
Open a web browser in your host operating system (not in your Fedora 12 guest O/S, since you will be rebooting Fedora 12 and don't want to lose your place) and go to the Course Home Page for this course. Enter the Class Notes Index page and locate the VMware Tools installation and configuration page.
Find there and follow the instructions for installing VMware Tools into your Linux machine. This will let your Fedora Linux window expand to the size of your VMware window. Showing this expanded window to your instructor when you finish this lab is worth one of your lab marks.
Use VMware to create a “Snapshot” (backup) of the current system. (VM | Snapshot | Take Snapshot) You can return to this snapshot if you have problems in later labs. Using the snapshot will save you from having to re-install the entire system. Showing this snapshot is worth one of your lab marks.
Do not install any Fedora 12 updates – there are too many of them. Do not update Fedora 12.
Know how to safely shut down your Linux Fedora virtual machine using the System Shut Down menu. Use the Fedora system menu to shut down Linux before you close VMware before you shut down your host Windows system. Knowing the correct shut-down order is worth one of your lab marks.
Treat every virtual machine as you would a real physical computer. You must power on and power off your real and virtual systems in the correct order to avoid file system damage and locked VMware images:
Go into each and every running Virtual Machine and shut it down, or use the VMware Power menu to "Suspend" the machine and wait until every virtual machine fully shuts down or is suspended. Failure to Shut Down or Suspend will result in corrupted and locked virtual machines!
Close the VMware application (after you have shut down or suspended all virtual machines).
Shut down the Windows host (after closing VMware) and wait until the power goes off.
After the Windows host computer turns off (wait for it!), only then turn off any external caddy.
After powering off the caddy, wait 15 seconds until the disk inside the caddy stops spinning.
Unplug the caddy wires and pack the caddy in thick bubble wrap to take away in your backpack.
Don't drop your backpack with your caddy inside it!
As an alternative to shutting down each operating system inside each of your virtual machines before you close VMware, you may use your VMware Power menu to "Suspend" each of your virtual machines before you close VMware, which is similar to putting each virtual machine into Sleep mode. Suspending and then resuming a virtual machine is much faster than shutting down the O/S and then rebooting it. For most cases where you need to close VMware and power off your computer, suspending all your virtual machines is a much faster choice than shutting them all down. Use VMware Suspend instead of O/S Shut Down when possible.
Make sure your Networking is working before you configure a network printer. (Check the Network icon in the Linux top menu bar, and make sure you can use Linux Firefox to open a Google window inside Linux.) Installing a network printer requires network access.
Although the printer in T126 is a Lexmark model T644, the Lexmark E220 driver is available and works, so we use that below.
Select System -> Administration -> Printing
Under the “New” menu select Printer
Under Devices, open Network Printer
Under Network Printer, select LPD/LPR Host or Printer
Put 10.50.16.249 as the Hostname (this IP address is written near the printer)
Leave the Queue empty (blank)
Select Forward
In the Choose Driver dialog box, select Lexmark and then click Forward
Under Models select Optra E220
Under Drivers select the top (recommended) driver
Click Forward
In the Describe Printer dialog box shorten the Printer Name (not the Description) to lp126
In the Location box enter: Lexmark T644 at 10.50.16.249 in T126
Click Apply
Rather than printing a test page, print something you actually need printed!
Note that the printer will only work if your Fedora Linux system is fully connected to the network, as indicated by the Network icon in the Linux top menu bar. Be careful about queueing multiple print jobs with the network disconnected - all those print jobs will rush to the printer when the network becomes active. Go to System -> Administration -> Printing and right-click on lp126 and select “View Print Queue” to see and delete queued print jobs you don’t need. Once all the print jobs go to the printer, you have to physically run to the printer and quickly use the front panel buttons to cancel all the unwanted print jobs. Save trees! Don't print!
VMware Tools working (show window resize) __________________
Fedora printer configured with correct printer name __________________
Snapshot taken __________________
Recite correct shut-down order __________________
You put your name on your caddy and power supply __________________
|
Page
|
©2010-2012 Algonquin College Shawn Unger / Todd Kelley / Ian! D. Allen |
Version 15 |